fbpx

Out of the box Revit has limited material types, fill patterns and rendering appearances. When a project needs a material type not in the standard Revit library, a custom material type with a new surface pattern and rendering appearance is possible. For this demonstration, the ACME BRICK website is used to show how to create a new brick type for a king size brick.

king size brick ACME website
king size brick nominal face dimension

From the ACME BRICK website, brick sizes, and image files for material colors are found. Create a new folder in the project file to save a downloaded image that is used for the project.

New King Brick Hatch Pattern

The first step to change the surface pattern is accomplished by creating a new hatch pattern to load into the Revit project.

Revit hatch patterns are found here: C:\Program Files\Autodesk\Revit 2020\Data

Navigate to the Revit hatch pattern file. Once opened, the coded hatch patterns for each surface pattern are found and a new surface pattern can be created.

navigate to Revit hatch pattern file

Hatch patterns are coded information that define the pattern style. Note that the brick surface pattern begins with ;%TYPE=MODEL. This defines the difference between drafting patterns and model patterns. For the king size brick, the model type fill pattern is necessary to correctly adjust the pattern to the scale of the view. Below is the code for the standard brick running bond that will be used to modify for the king brick.

standard brick running bond code

To create the king brick hatch pattern, the US Standard brick running bond code is modified for the king brick size per the ACME BRICK website. First, copy and paste the standard brick type below the standard brick running bond and begin the modification for the new king size brick. Each number in the surface pattern represents the height and length for the pattern type. To modify the hatch pattern, change the height and length as shown below to the nominal dimensions from the ACME website.

modify the hatch pattern

Save the modified Revit pat file to a folder created in the new project file for the new pat file and material image.

Create a New Fill Pattern and Wall Type

Create a new fill pattern in Revit through the Manage Tab, Additional Settings and select Fill Patterns.

create new fill pattern in Revit

This brings up the Fill Patterns box where the new pattern is created. The sequence for the new hatch pattern is Select Model, Create New, name the new surface pattern, and select Custom. Browse to the new pat file saved in the project folder.

browse to new pattern file

The next step is to create the new wall type with the new surface pattern:

  1. Create a new wall type
  2. Create a new material type
  3. Rename the new material type
  4. Assign the new material type a new surface pattern
  5. Select the model type fill pattern
  6. Select the new pattern created for the king size brick
create new wall type with surface pattern

Below is the new wall that now has the new surface pattern for a king size brick. The dimensions are checked for accuracy.

new wall with new surface pattern

Modifying Rendering Appearance

Below is the appearance for the common brick standard running bond from “out of the box” Revit. The default image files are located here:

OOTB Revit common brick standard running bond

This is the standard running bond appearance:

standard running bond appearance

The new image from the ACME website that is saved in the project’s folder brick / materials folder is used to create a new rendering appearance.

king size brick texture

The next step is to modify the rendering appearance for the king size brick with a custom image from the file downloaded from the ACME BRICK website. Change the view to Visual Style: Realistic with Edges to view the rendering appearance. By default, the appearance is solid gray.

default visual style
change visual style

Select the image file saved in the Mats folder.

Add the new material type casa blanca for the Brick King.

add new material type

Below are the steps to modify the appearance for the new material type, casa blanca king brick, using the image file from the ACME BRICK website.

Adjust the appearance for renderings: 1) Select the Appearance tab 2) Select (no image selected) to add the image 3) Navigate to the new image file location saved in the project’s folder and select the new material 4) Modify the scale of the image to match the king size brick by selecting the image.

select image to modify scale

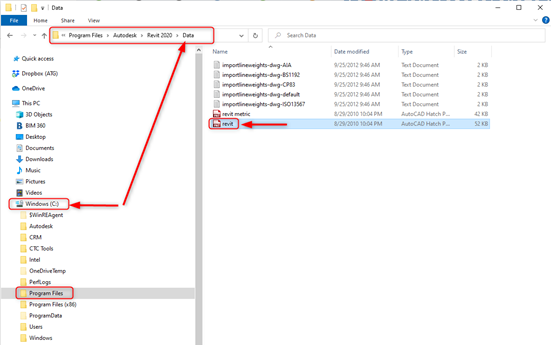
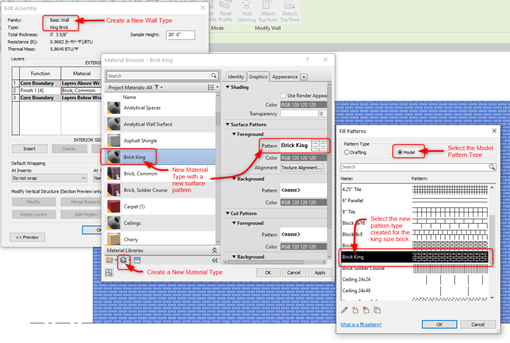
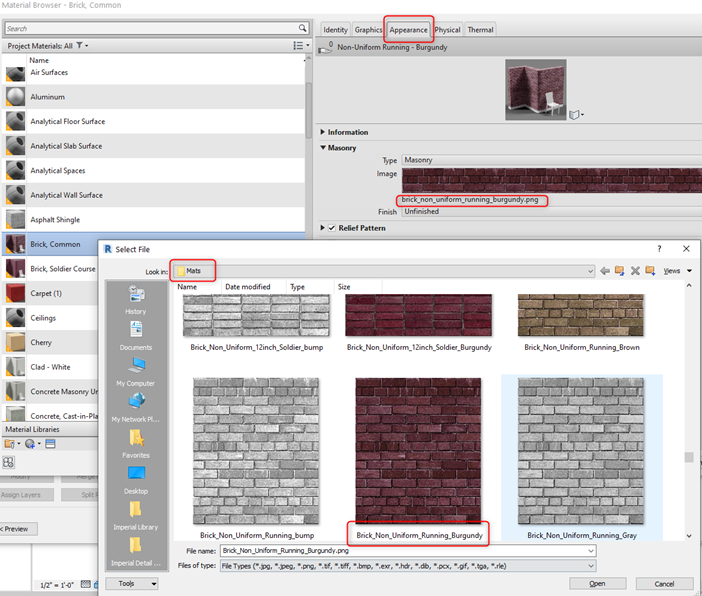
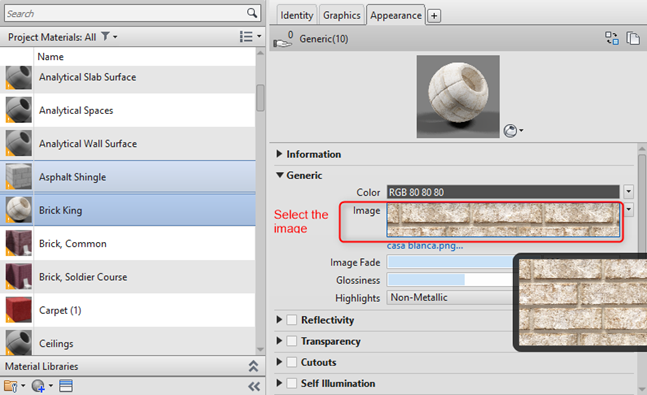
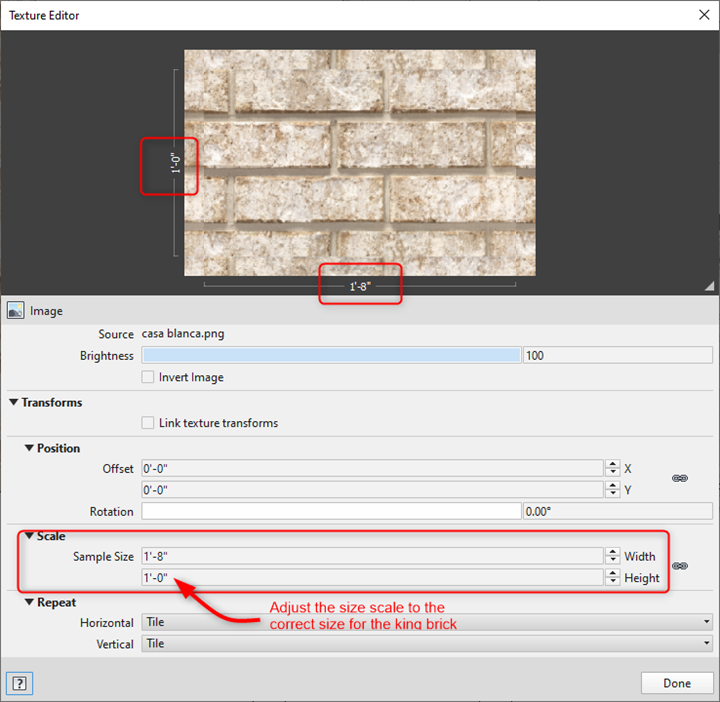
Modify the image scale to the correct size for the king brick by selecting the loaded image in the Appearance box above.

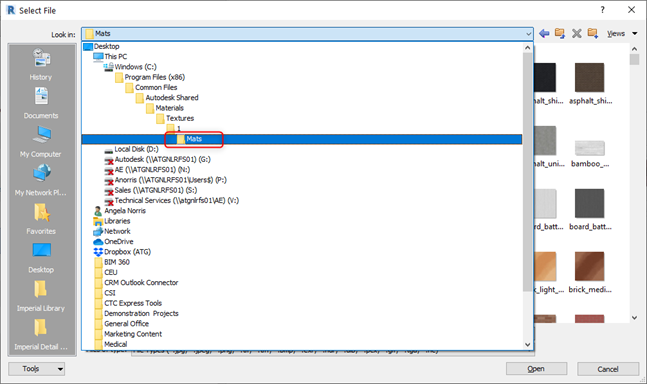
Select the image file. The Texture Editor box opens that allows an adjustment for the image’s rendering appearance.

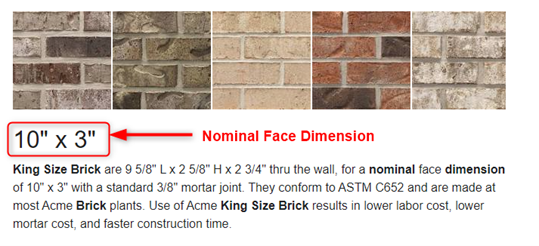
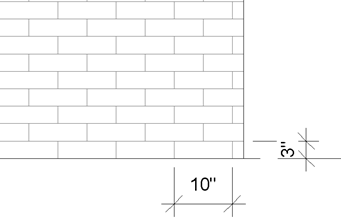
By default, under Scale, the sample size is 2’ x 2’. The new image will need adjusting to the correct size for the king brick. In this editor box, the brightness, position, and repetition are also adjustable for the rendering appearance needed for the project. Adjust the box size to 1’ x 1’-8” for the nominal dimensions of the king size brick for 4 brick heights and 2 1/2 bricks for the length.

adjust scale for king size brick

Conclusion

Below is the result for the rendering appearance of the king size brick. Dimensions are checked for accuracy in an elevation view.

king size brick - rendered

Final rendering image:

final rendering image

You may also like:

Contact Us

Newsletter