Publishing a Web Layer to ArcGIS Online from ArcGIS Pro

ArcGIS Pro
The first step is to bring your shapefile into ArcGIS Pro. Make sure all edits are completed before posting the data to AGOL.
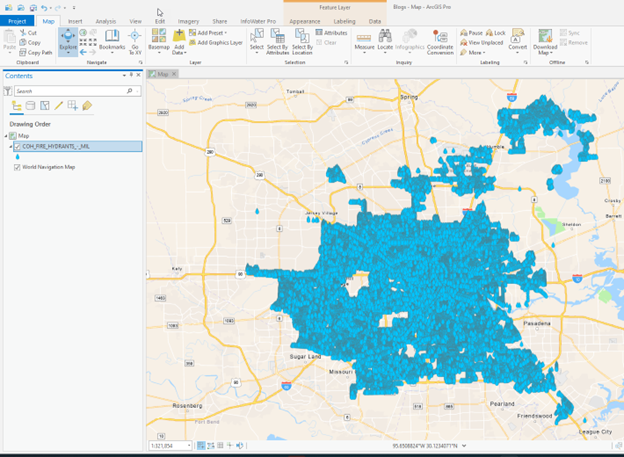
Why ArcGIS Pro and not ArcGIS 10.X?
One of the biggest reasons for the creation of ArcGIS Pro is because of its ability to work better with AGOL. It marks a new era in how we work and will impact your future workflows
The Publishing Process
Once your data is ready to upload to AGOL:
- Click on the “Share” Tab in the ArcGIS Pro ribbon.
- Select the “Web Layer” pulldown
- Select “Publish Web Layer”
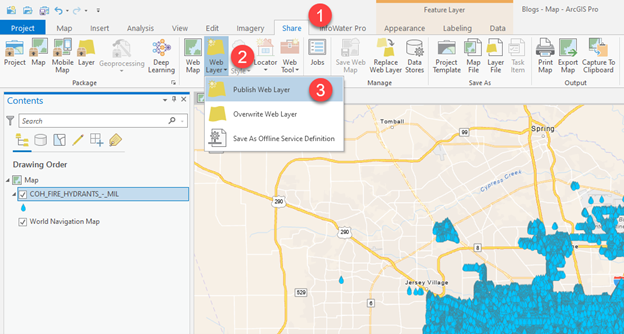
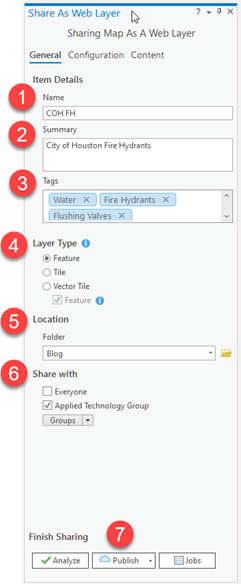
This will open the “Share as Web Layer” dialogue box.
- Provide a unique name for your organization/team members to understand
- Fill in a brief summary of describing the layer
- Add unique tags for searchability in the future
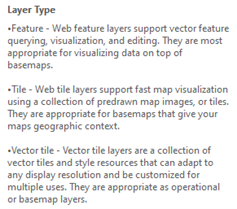
- Select a “Layer Type” per the descriptions below
- Identify the location in AGOL for the data to be placed
- Under the “Share With” section select if this is a file you will share within your organization or with Everyone in the AGOL community.
- Groups – If you have projects or clients set up within groups, be sure to select the group here.
- “Publish” the shapefile feature online.
ArcGIS Pro
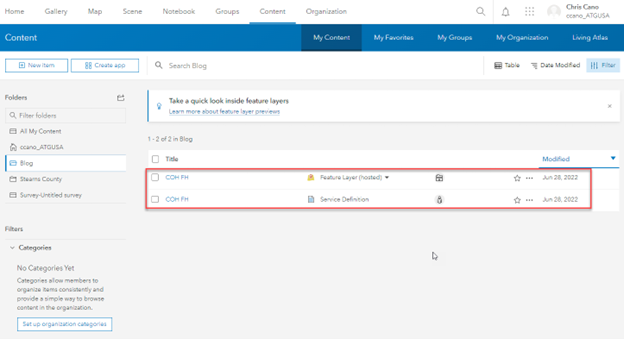
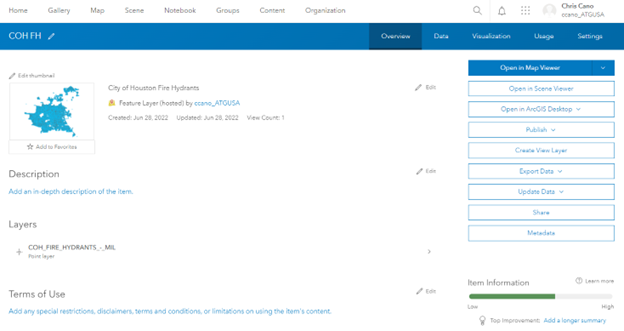
Your file is now uploaded as a hosted feature layer and ready to use within AGOL by you, team members, or group members.
Conclusion
So, to recap, we used ArcGIS Pro to upload our City of Houston Fire Hydrant shapefile to ArcGIS Online (AGOL) as a hosted feature layer. Specifically, the Publish Web Layer tool is found in the Share tab of our ribbon.
With this workflow, we now have access to the various tools within the AGOL platform, opening the way for our mobile team members to access project data. Plus, with the way things have been moving, the future will soon be web-based workflows. The only question now is, are you ready for it? If not, connect with us at ATG USA so we can get you moving in that direction.

