Calculate Peak Runoffs
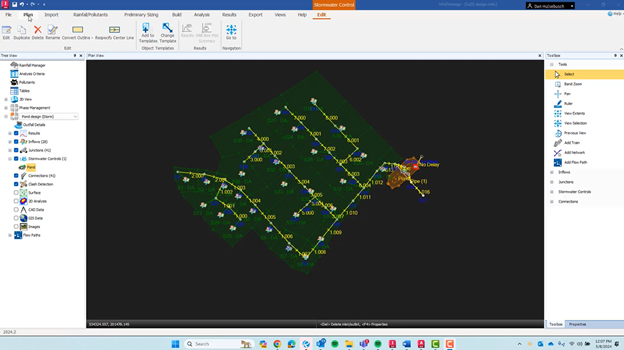
Provides quick site navigation and access to various options, eliminating the need to search through ribbons. It groups the site contents by Phases, further categorized by type.
Inflows
Instead of importing inflows from Civil 3D, you can add them under the Inflows dropdown in the Toolbox sidebar. Here you’ll find tools for Base Flow, Catchment Area, Green Roof, and Hydrograph.
Time of Concentration
Calculate the amount of time that it will take for water landing on the roof area to enter the system. The inflows from the area will then be evenly spread over this time when the area is analyzed.
Curve Numbers
Curve Numbers are used to predict runoff or infiltration from rainfall. Using the SCS method for runoff calculation, you can use the Calculator to determine the Curve Number.
Storm System Design
Junctions
Connect two or more connections, representing changes in the
system or physical structures like manholes.
Pipes
Design
pipes by identifying the appropriate rainfall theory for accurate sizing and
placement.
Channels
Utilize three different channel types: Rectangular,
Trapezoidal, and Triangular.
Flow Paths
Define the flow path for water movement through your system.
Pond Sizing
User Defined Ponds
Create and size ponds to meet your project’s specific needs.
Green Infrastructure Design
Bioretention
Design bioretention basins, also known as rain gardens, for
stormwater filtration and attenuation.
Porous Pavers
Porous or “permeable” pavement provides structural support but allows stormwater to drain directly through the surface into an underlying stone bed or the soil below, reducing surface stormwater runoff.
Green Roofs
Calculate your runoff flow using the Green Roof method.
Report Printing
Generate comprehensive reports summarizing your design calculations and analysis results for clear communication and project documentation.